


Occasionally the surface of your project will contain oils and other contaminants preventing even adhesion of Glass Coat. Use Glass Coat Premium Timber Sealer to seal the surface of the timber to be treated. After treatment, avoid contaminating the surface. Try not to touch surfaces with your fingers. If you don’t have access to Glass Coat Premium Timber Sealer, it is perfectly fine to use another sealer. Several are available in hardware and paint stores. One we like to recommend is Cabot’s Crystal Clear, a water-based product that can be applied with a brush and which dries quickly. Two or three coats may be applied. It is preferable NOT TO USE an oil based sealer as this may react with the gloss after applying.

Using a low tack (silicon treated) masking tape, mask the edges of the surface to be treated, as illustrated. Take the masking tape up to the leading edge of the surface, ensuring that it is not sitting proud above the edge. This is likely to cause the Glass Coat to well up against the tape, which will create a problem after pouring. Since Glass Coat is a pouring medium rather than a painting medium and it is important not to impede the flow of liquid over the edges.

If you have deep sides that need protecting from any overflow of poured Glass Coat, you can build a skirt around the perimeter by adhering some paper or plastic film to the underside of the masking tape.
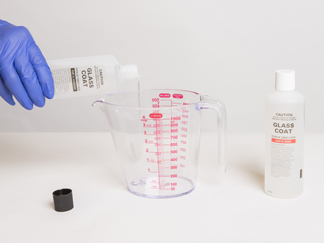
Measure precisely one part resin (red cap) and one part hardener (black cap) in a disposable mixing vessel. A clean, dry jam tin or jar will do fine. I use polystyrene cups (200ml) which can be easily disposed of after use. I like to work in batches of about 200ml at a time. If I am coating a large surface, then simply mix more 200ml batches. (Remember that you will coat about 500mm x 500mm with every 200ml of mixed Glass Coat

After pouring equal measures into your mixing vessel, allow the bottles to come to rest on your workbench for a few seconds. When they have settled, hold the bottles up to the light and compare the levels. They must be equal before pouring and equal after. Inaccurate measuring will spoil the project NEVER USE A MEASURING device to measure equal parts. Just compare levels in the translucent bottles after each pour. Tip: Remember that the resin (red cap) is thicker than the hardener (black cap), so allow a few seconds for contents to settle down the sides of the bottles before comparing levels.

Using a broad flat stirrer (there is a spatula included in each kit) mix the two parts together completely for a minute or two. This is perhaps the MOST IMPORTANT instruction. I imagine that I am mixing two different colours together into a single colour. Don’t be deceived by the fact that the two parts are clear. They still need to be thoroughly integrated if the finish is to be perfect.

Ensure that the surface to be treated is dust free. Give it a light dust before pouring. In fact it is important to work as much as possible in a DUST-FREE environment. Pour the mixed Glass Coat onto the surface. You must do this within about 20 minutes of mixing the two parts together. You cannot pour the formula onto the surface once it has started to cure.

Spread the Glass Coat across the surface. You can use a brush or a spreader, but it is important to remember that Glass Coat is a pouring medium rather than a painting medium. Use the brush as a spreader, liberally pushing the Glass Coat to the perimeter of the project. Don’t be concerned if the gloss overflows the edge. This is not important. In fact it is better to pour too much than too little, since curing sometimes causes slight contraction of gloss from around the perimeter.

After you have completed the pour and spread of Glass Coat, leave the surface to settle for 5 minutes. This will enable air bubbles that have been generated in the mixing process to come to the surface. It is possible that the Glass Coat will draw air bubbles from below the surface of the timber. This is particularly common on certain types of timber, or timber that has been inadequately sealed. These can easily be removed by lightly sweeping over the surface with a naked flame such as is produced by a butane-powered torch. Be careful not to over-do this as the surface will scorch if the flame is left too long on any particular spot. The brief application of heat is all that is required to expand air-bubbles through the surface. (Don’t use hair-dryers or anything that generates hot air, as this will only push the gloss over the surface and is almost certain to spoil the finish)

Remove the masking tape slowly before the surface is fully cured. It is best to leave the surface for several hours until the first stage of setting is complete. You can even leave the tape in place for 24 hours, but don’t leave any longer or the surface will approach full curing and the removal of the tape will be more difficult.